
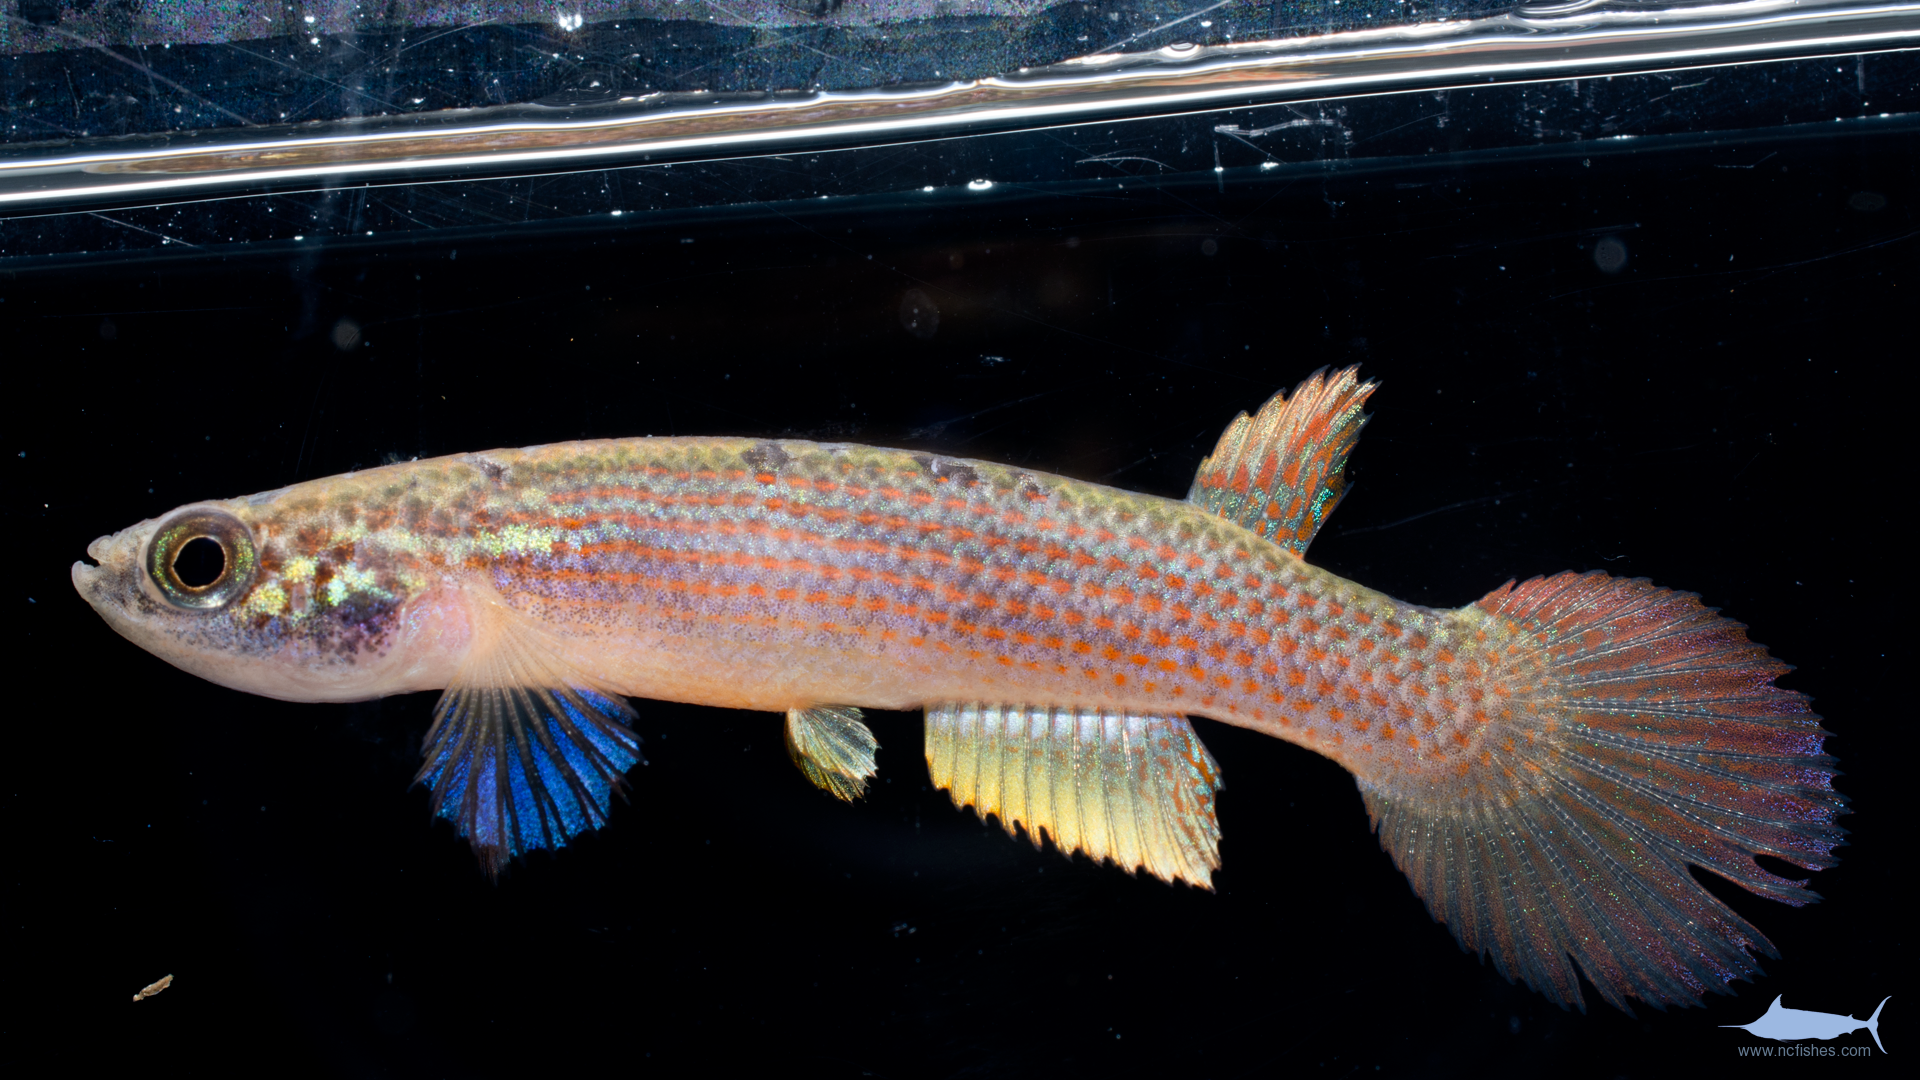
Lately we have been playing around with shooting fish on white backgrounds. The gist of the process is to use two strobes behind a phototank and pointing at a white wall, then a third strobe to illuminate the fish. You want to overexpose the wall to create the white background. The process is a bit tricky, and one that Jesse can explain much better than I can, but the results speak for themselves!
We still aren’t sure if we like this method better, I am still a fan of the black, but it is very useful for showing features of fins that are lost on black. Since it is winter and fish weren’t exactly jumping into our dipnets, we picked up a few aquarium fishes to test. Any thoughts?
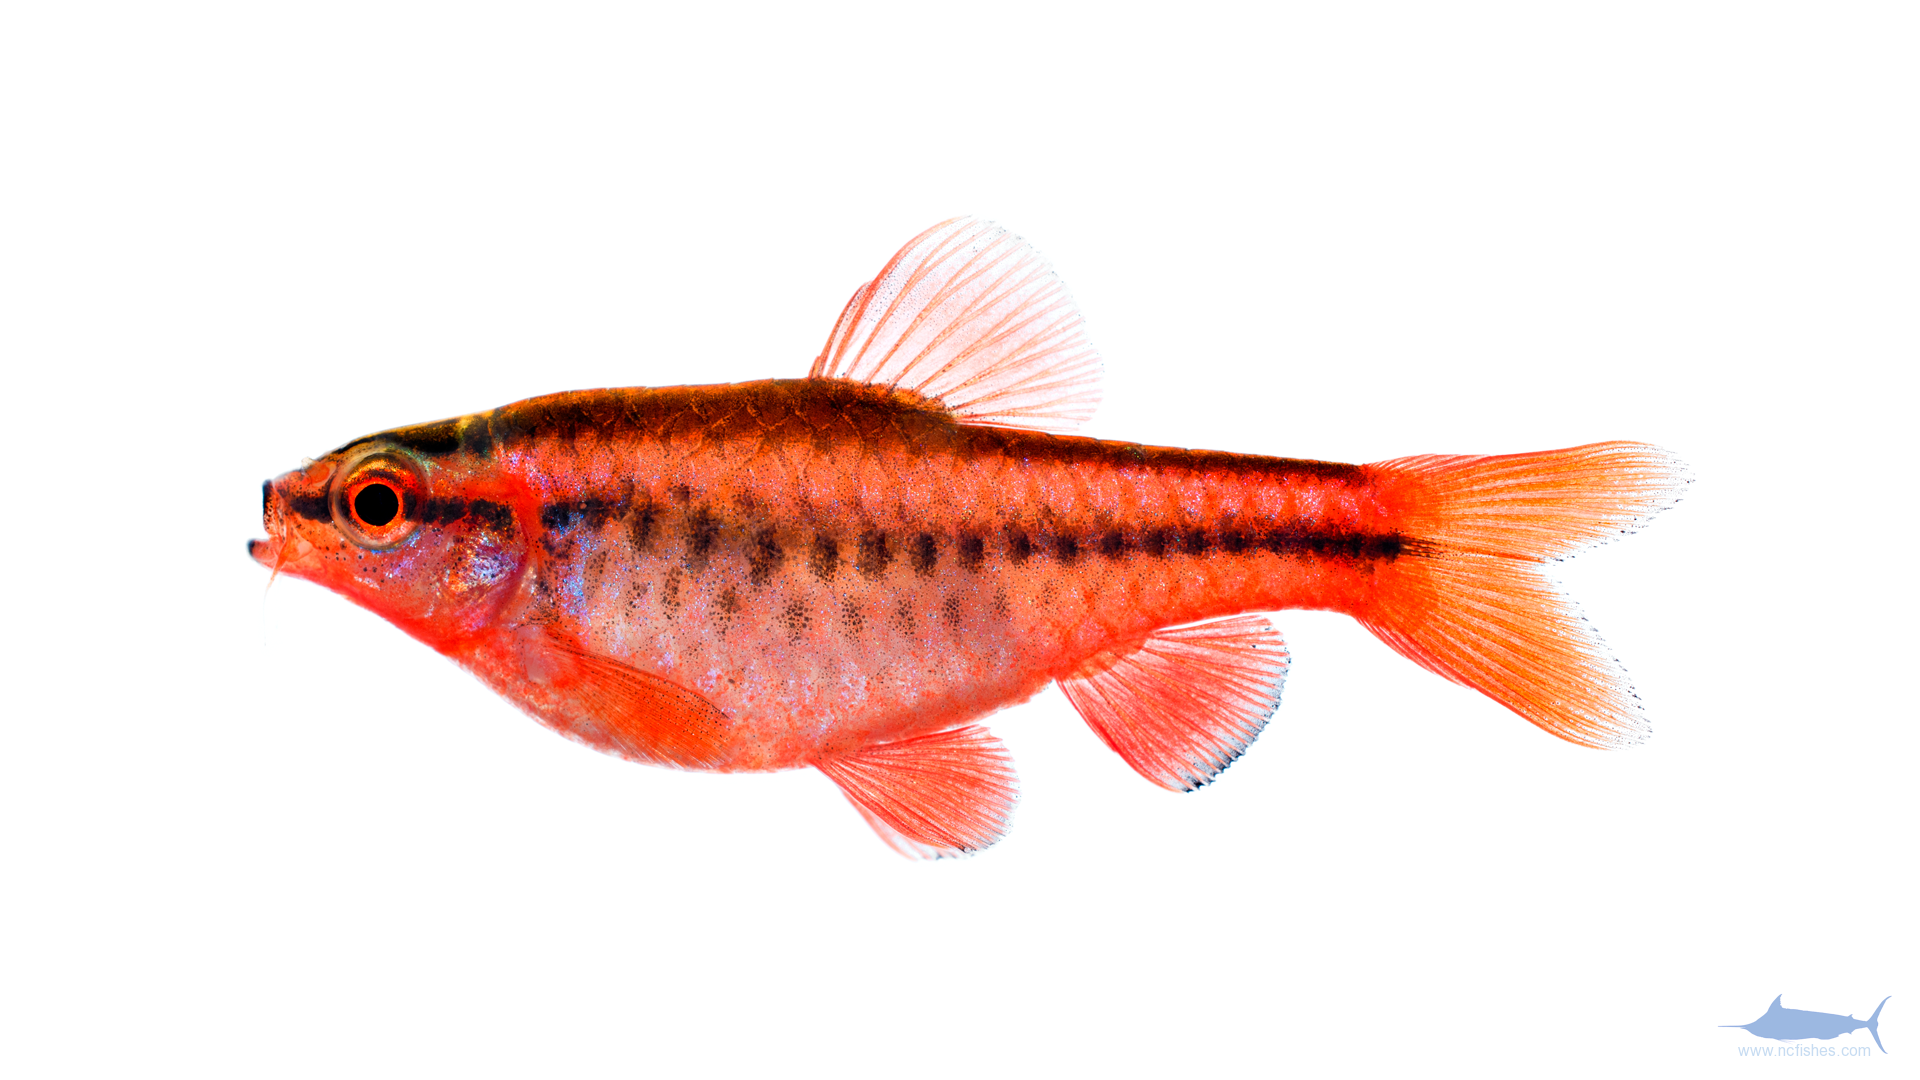
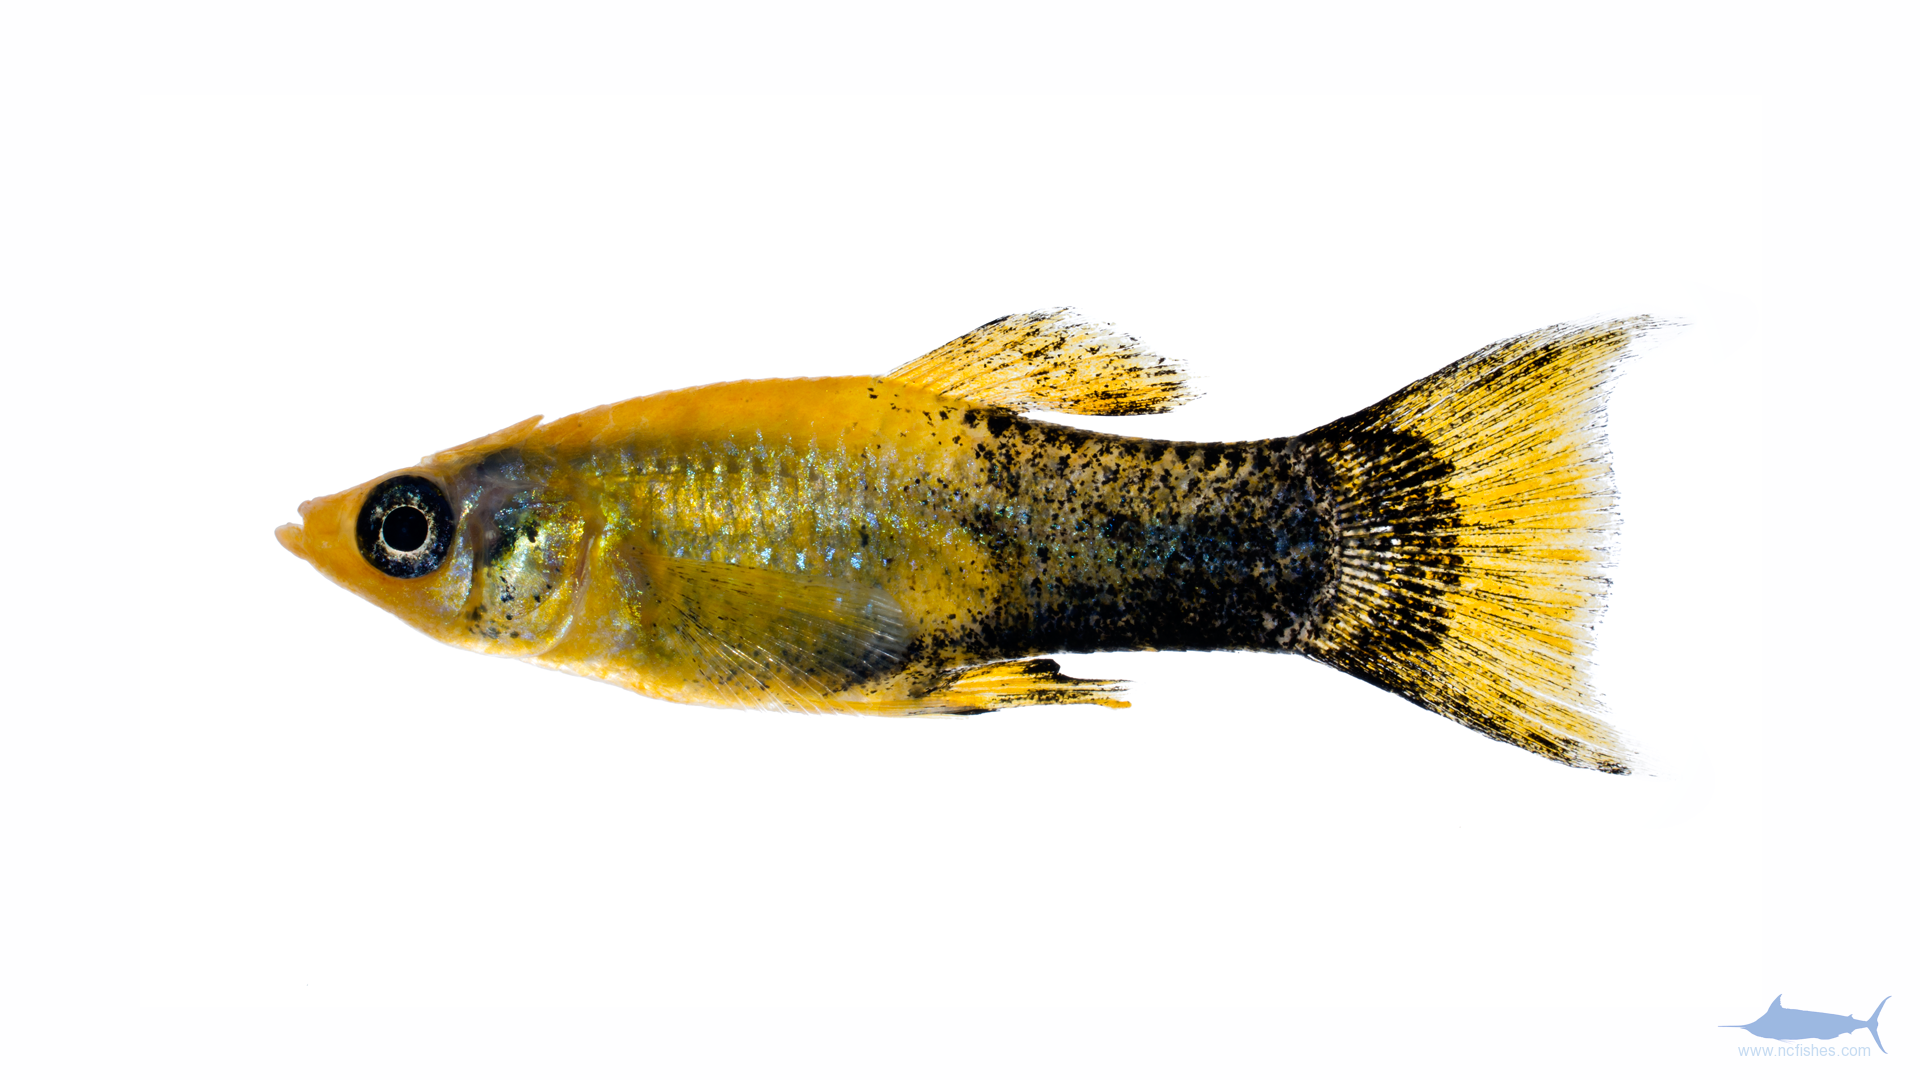

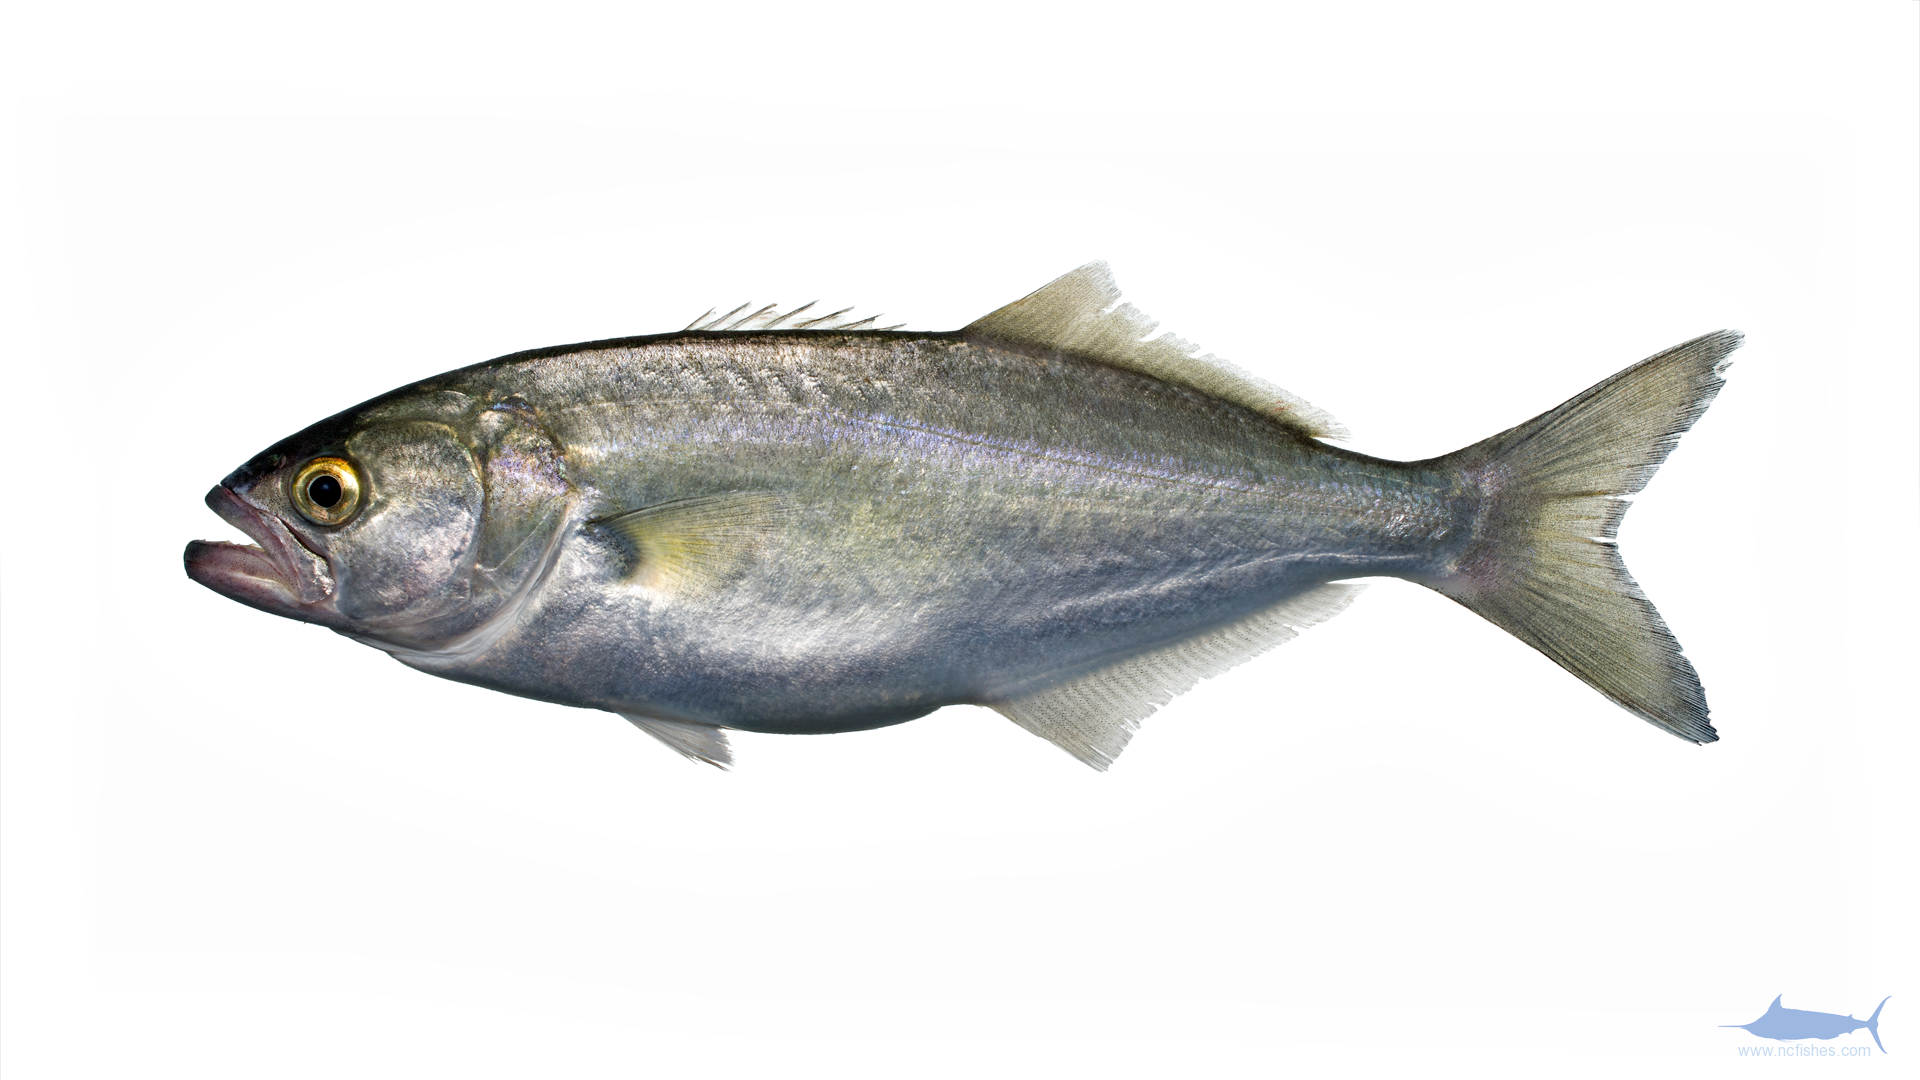
I think the new style images are as equally fetching as per the black backgrounds of the original images created here. I guess the only ‘downside’ is that, as per losing shadow detail against a dark background, *highlight detail is compromised if shot against a white backdrop! (*e.g. dorsal fin on cherry barb and tailfin on Zebra danio) The answer would probably be to use the uninspiring 18% neutral-grey background of the good ol’ Kodak grey card, but it would not have the ‘aesthetic feel’ (or impact?) of either the white or black backdrops – maybe give it a try and post some images for comment…? Also, the main light used on the fish subjects could be controlled perhaps more finely too, as the reflective nature of various species will differ greatly – i.e. slight underexposure might work better on the species I mention or, of course, very selective processing (i.e. dodging or burning) in the imaging software (Lightroom, Photoshop…?) Hope this helps!
Dear Scott
I’m Chaitanya, Chai for short, I stumbled across your flickr while going through pictures of fish and I quite enjoyed the rest of your gallery!
I myself am a fish photographer (chai photography on flickr), especially interested in killifish and my present style is to shoot with a ‘black background’ as you do. However I must admit, I could learn a thing or two from you!
On that note, I would like to ask, what are you techniques in exposing the fish so well, yet maintaining a pitch-black background?
What I am presently doing is shooting against a black background in a blacked out, area with ambient light entering only from the front of the space. However since my studio aquarium is a small one, I inevitably get reflections and minute dirt in my pictures. Post-processing makes it easy to obtain a jet black, but if you could be so nice as to describe or even send me a picture of your setup, I would appreciate it very much and use it to improve my own method. 🙂
Thanks you for your time!
Chai, pleasure to meet you! I am also a big fan of killifish, and really liked seeing your Flickr. The method I use is really straight forward and easy, since shooting photos in the field is already challenging enough. The basics require a small phototank, a method to blackout the ambient light, and an external strobe. It sounds like you’ve got most of the essentials already, and I can only recommend a few changes. First off, I never use an aquarium. Aquarium glass is too thick, and usually adds a bit of blue or cyan hues to the image. Instead, I use a custom made phototank that I construct out of 8*10 inch glass that I repurpose from inexpensive picture frames. I mount two of these panes of glass to either side of a wood frame (constructed using 2″x2″ wood) with silicon. The phototank is meant to be inexpensive since we routinely break them. Some people prefer to use acrylic in place of glass, but I find it scratches too easy, which can ruin a picture. Lastly, I use a third piece of glass that I place inside the tank, and use to gently move the fish against the front pane of glass. Once the fish is in place, I use the handheld external strobe to illuminate the fish. As far as blacking out the tank, when in the field I just use a black towel, and my black camera bag. I shoot using a macro lens, in manual, (1/200 at f18). Post processing is as you described. I hope this helps, and if you have any other questions, don’t hesitate to shoot me an email: scott@ncfishes.com
Before and after:
Dear Scott,
A fellow Nikonian! Do you use a Nikkor lens? At present I find their pricing a bit prohibitive so I use a Sigma but I certainly plan to upgrade in the future.
I am very happy to receive such a detailed response from your side. The technique of building a custom tank and using a wooden interior is very intriguing. I have never built an aquarium with a wooden frame to be honest! But that makes quite a lot of sense and I’m eager to try it now! Is the back of the aquarium also wood?
I’m glad that you mentioned hand-held because I certainly have noticed a striking difference in results when I shoot hand held. It is much each to use the ‘flash drop-off’ to one’s advantage.
It also catches my attention that you don’t use a light to focus, is this because you can bring the fish to the front using the moving glass?
Thank you for your email, I will be in touch if need be! 🙂
Wish you a lovely day
-Chai